The Making of a Berkeley Garage
Over the past few years of taking photos of garages, uploading them to Instagram and then starting this site, a lot of people have asked me: “What’s your garage look like?” Kind of embarrassed, I always responded with, “Just a plain white door. Maybe I’ll make it special someday.” Well, that someday arrived in the summer of 2019 - and here I’ll share with you the general process of how I went from “plain white door” to a mural that means something to my family and is fun to look at whenever we pull up to the house. In case you want to know how to paint a garage mural, I should let you know at the outset I did not paint this myself. I hired a pro. But the process was still fun. Who knows? Maybe it’ll inspire others to take the plunge.
In May 2019, I went on Nextdoor to see if any artists were advertising their services for painting a mural on a garage door. I came across an ad by Malwina Stachurska, with a link to her site. My wife and I were impressed with her murals - specifically her trees. At that time I knew I wanted a tree to be in the mural, although I didn’t have a fully-formed image in mind. I emailed her, she got back, and the following week or so we met up to discuss what my family wanted on our garage door.
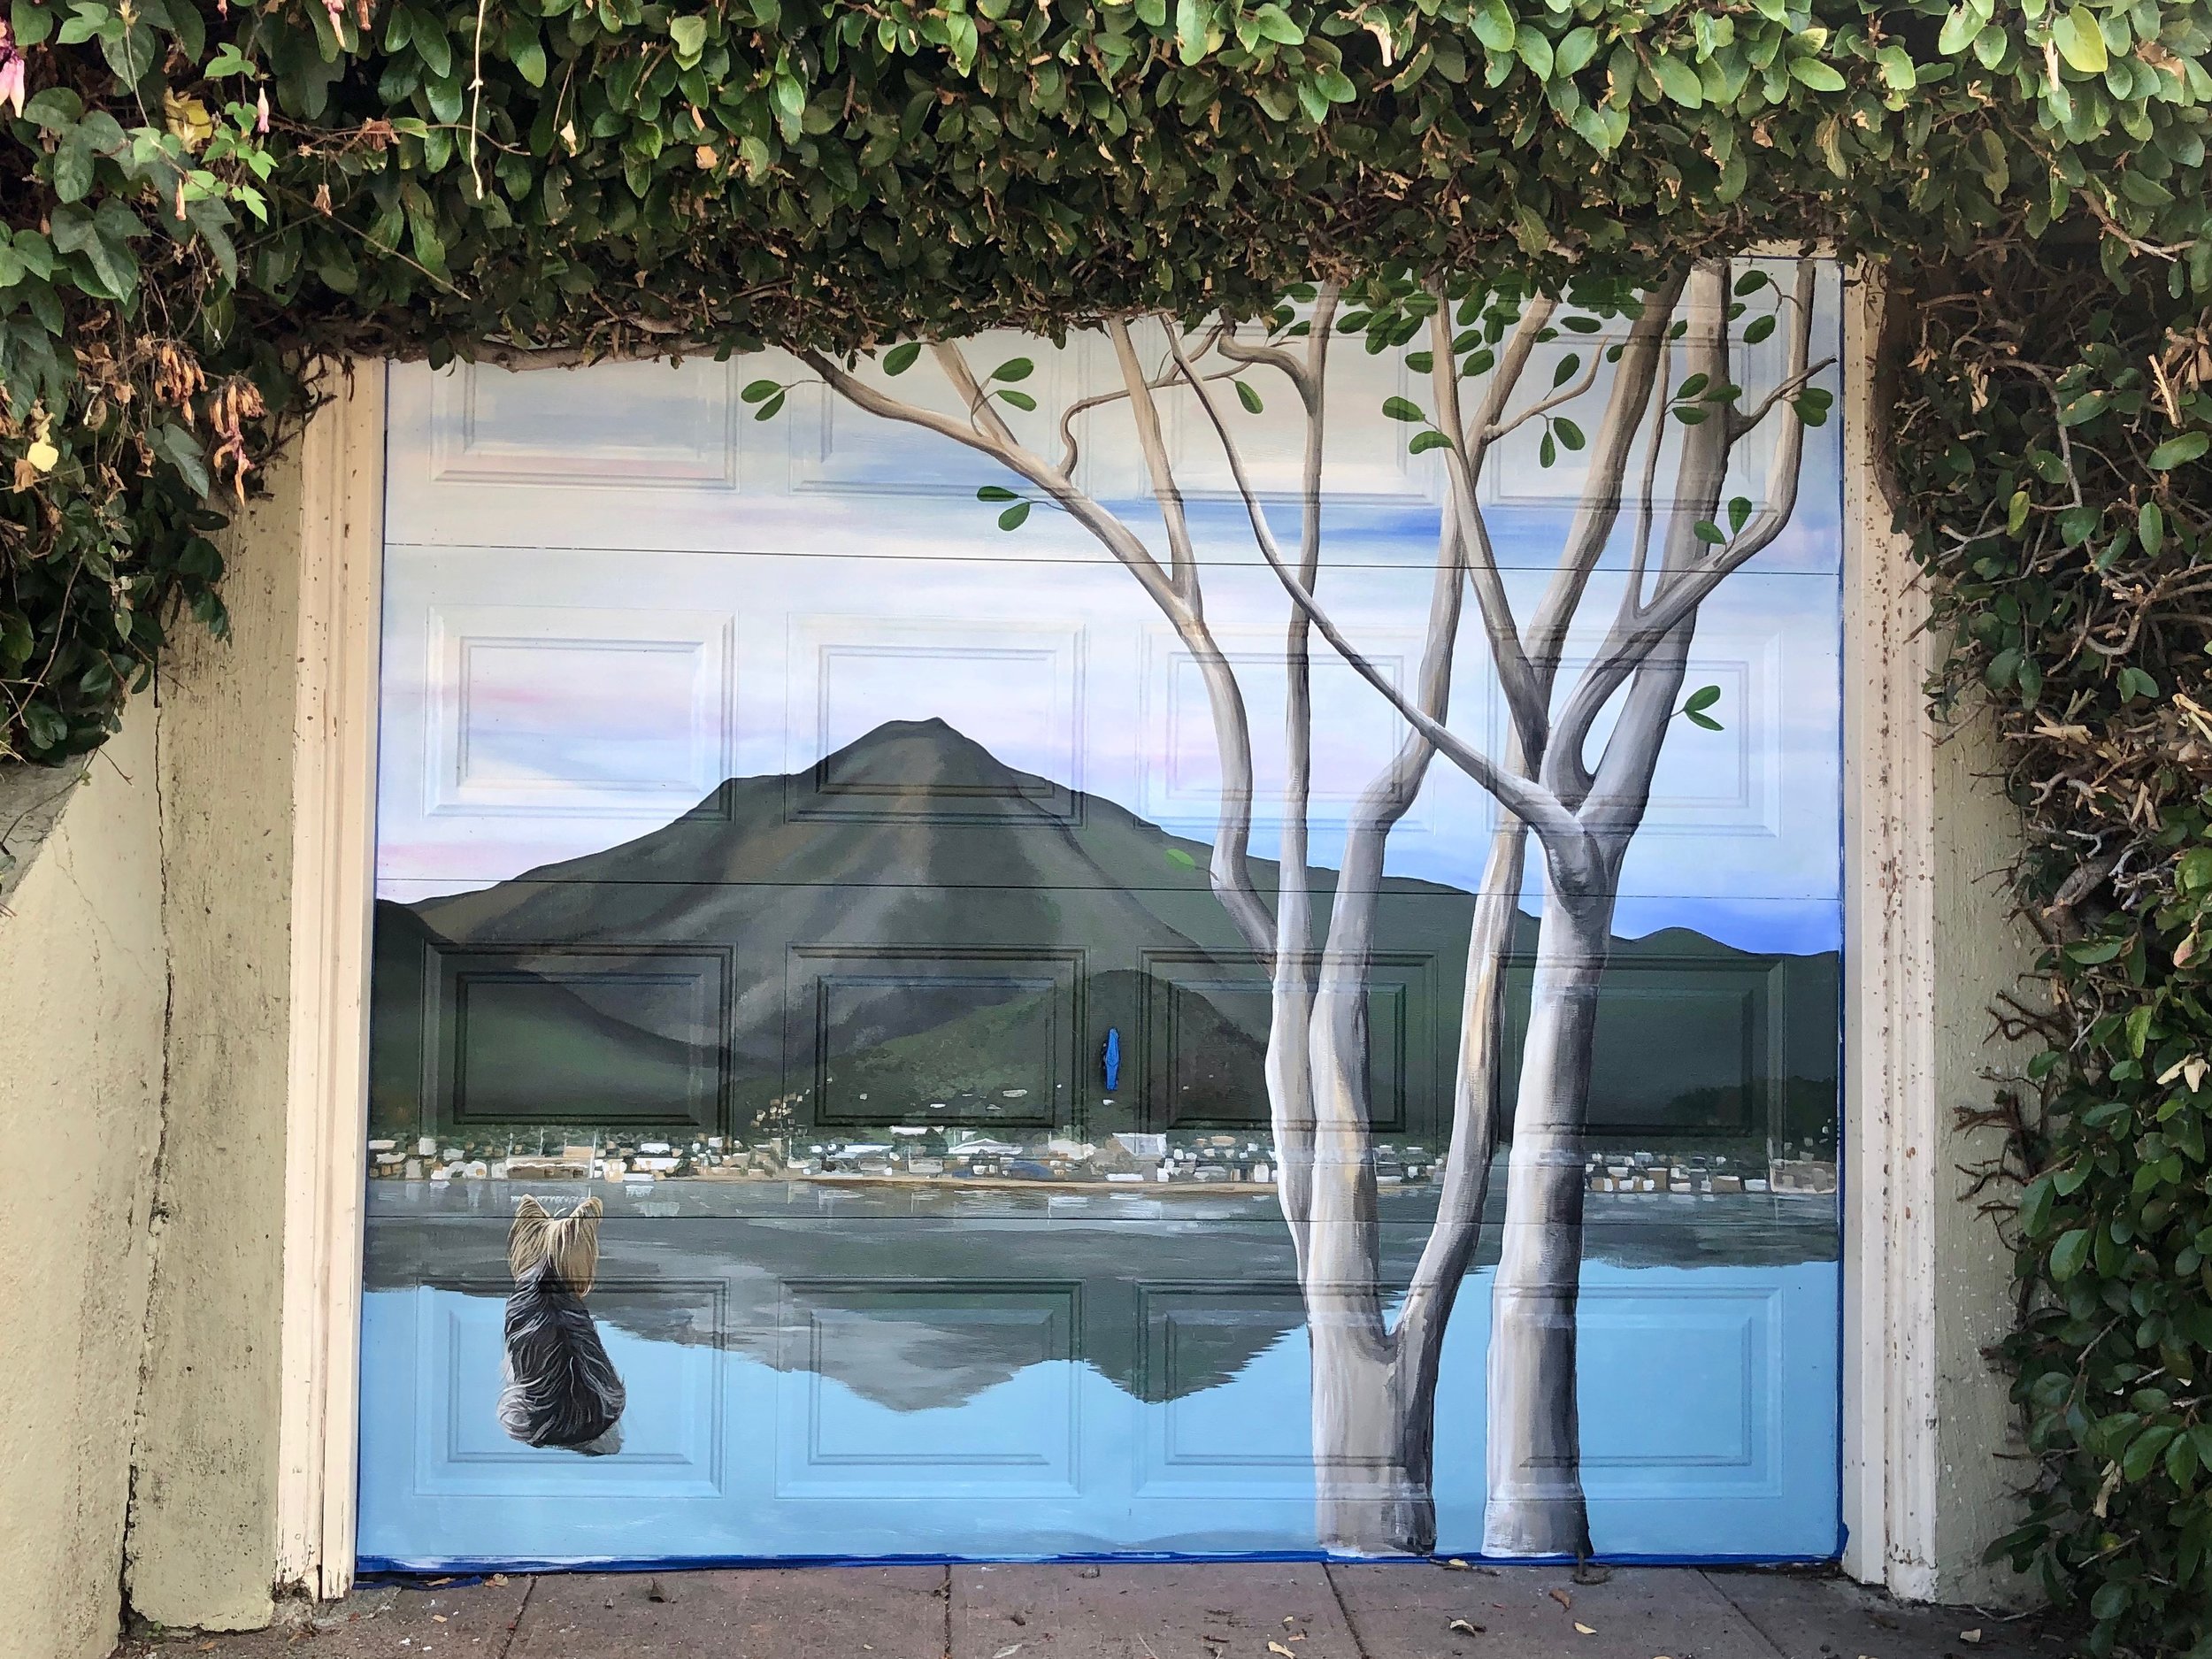
To prepare for our meeting, I sketched a small, cocktail-napkin-sized mockup of what we had in mind - Mt. Tamalpais in the distance (as if looking at it from Berkeley or nearby in the East Bay), with a tree in the foreground. See, my wife lived in Marin before moving to Berkeley, so Mt. Tam was her request. I wanted a tree (my last name is Wood). I asked my daughter what she wanted to have in the mural, and she chose California Poppies. Last but not least, we decided to throw our little dog into the mural as well - after all, she (or me having to walk her) was the whole reason I started the Berkeley Garages photo project in the first place. That was probably the trickiest part of the mix, as we needed the dog to sit still enough for us to take a photo of her from behind, sitting as if staring off at a view so the artist had an exact image of our dog to paint. Malwina took the sketch with her when she left and said she would make a mock-up on the computer and email it to us so we had an idea of what it might look like. She sent us a couple images to compare (an evening view and a daytime view), and we decided to go with the daytime image:

Basically, she took the various things I’d included in my sketch (and a couple things I later requested via email to add) and made a photographic combination of them all. This way she was sure she was going in the right direction and we knew what to expect. She then spent some time researching the best paints for the job, especially considering my garage is in direct sunlight for parts of the year. So, now that the design was finalized and the paints were bought, it was time to get started with the actual work.
Day One: The first thing we did to the door itself was give it a good power washing. As you can see from the photos, the door is surrounded by a bush that tends to stick to surfaces it grows along. So there was old plant and vine growth to blast off, along with the normal dirt and stains that accumulate over time on a garage exposed to the elements and nearby trash-bins.
Day Two: Once the door was totally clean, the artist was able to begin the mural process. The first step was to apply primer. Nothing fancy of course, but here’s how it looked at that stage:

Day Three: After giving the primer a couple days to dry, the artist painted the sky and general shape of Mt. Tamalpais, along with its reflection in the bay:

Day Four: Applying the texture and terrain of the mountain, and the blue of the bay. As you can see in the below photo, she just looked at the computer mock-up while she painted.


We honestly considered stopping everything at this point because this alone looked so good.
Day Five: Now that the mountain and water are done, it’s time to fill in the horizon with some buildings:


Day Six: With the background complete, it was time to start on the trees.

Day 7: On the seventh day, I rested. Meaning, I was on vacation and did not manage to take a photo of the trees after they were completed. But as you can see above, she painted the trees with primer before applying the actual color of the tree trunks.
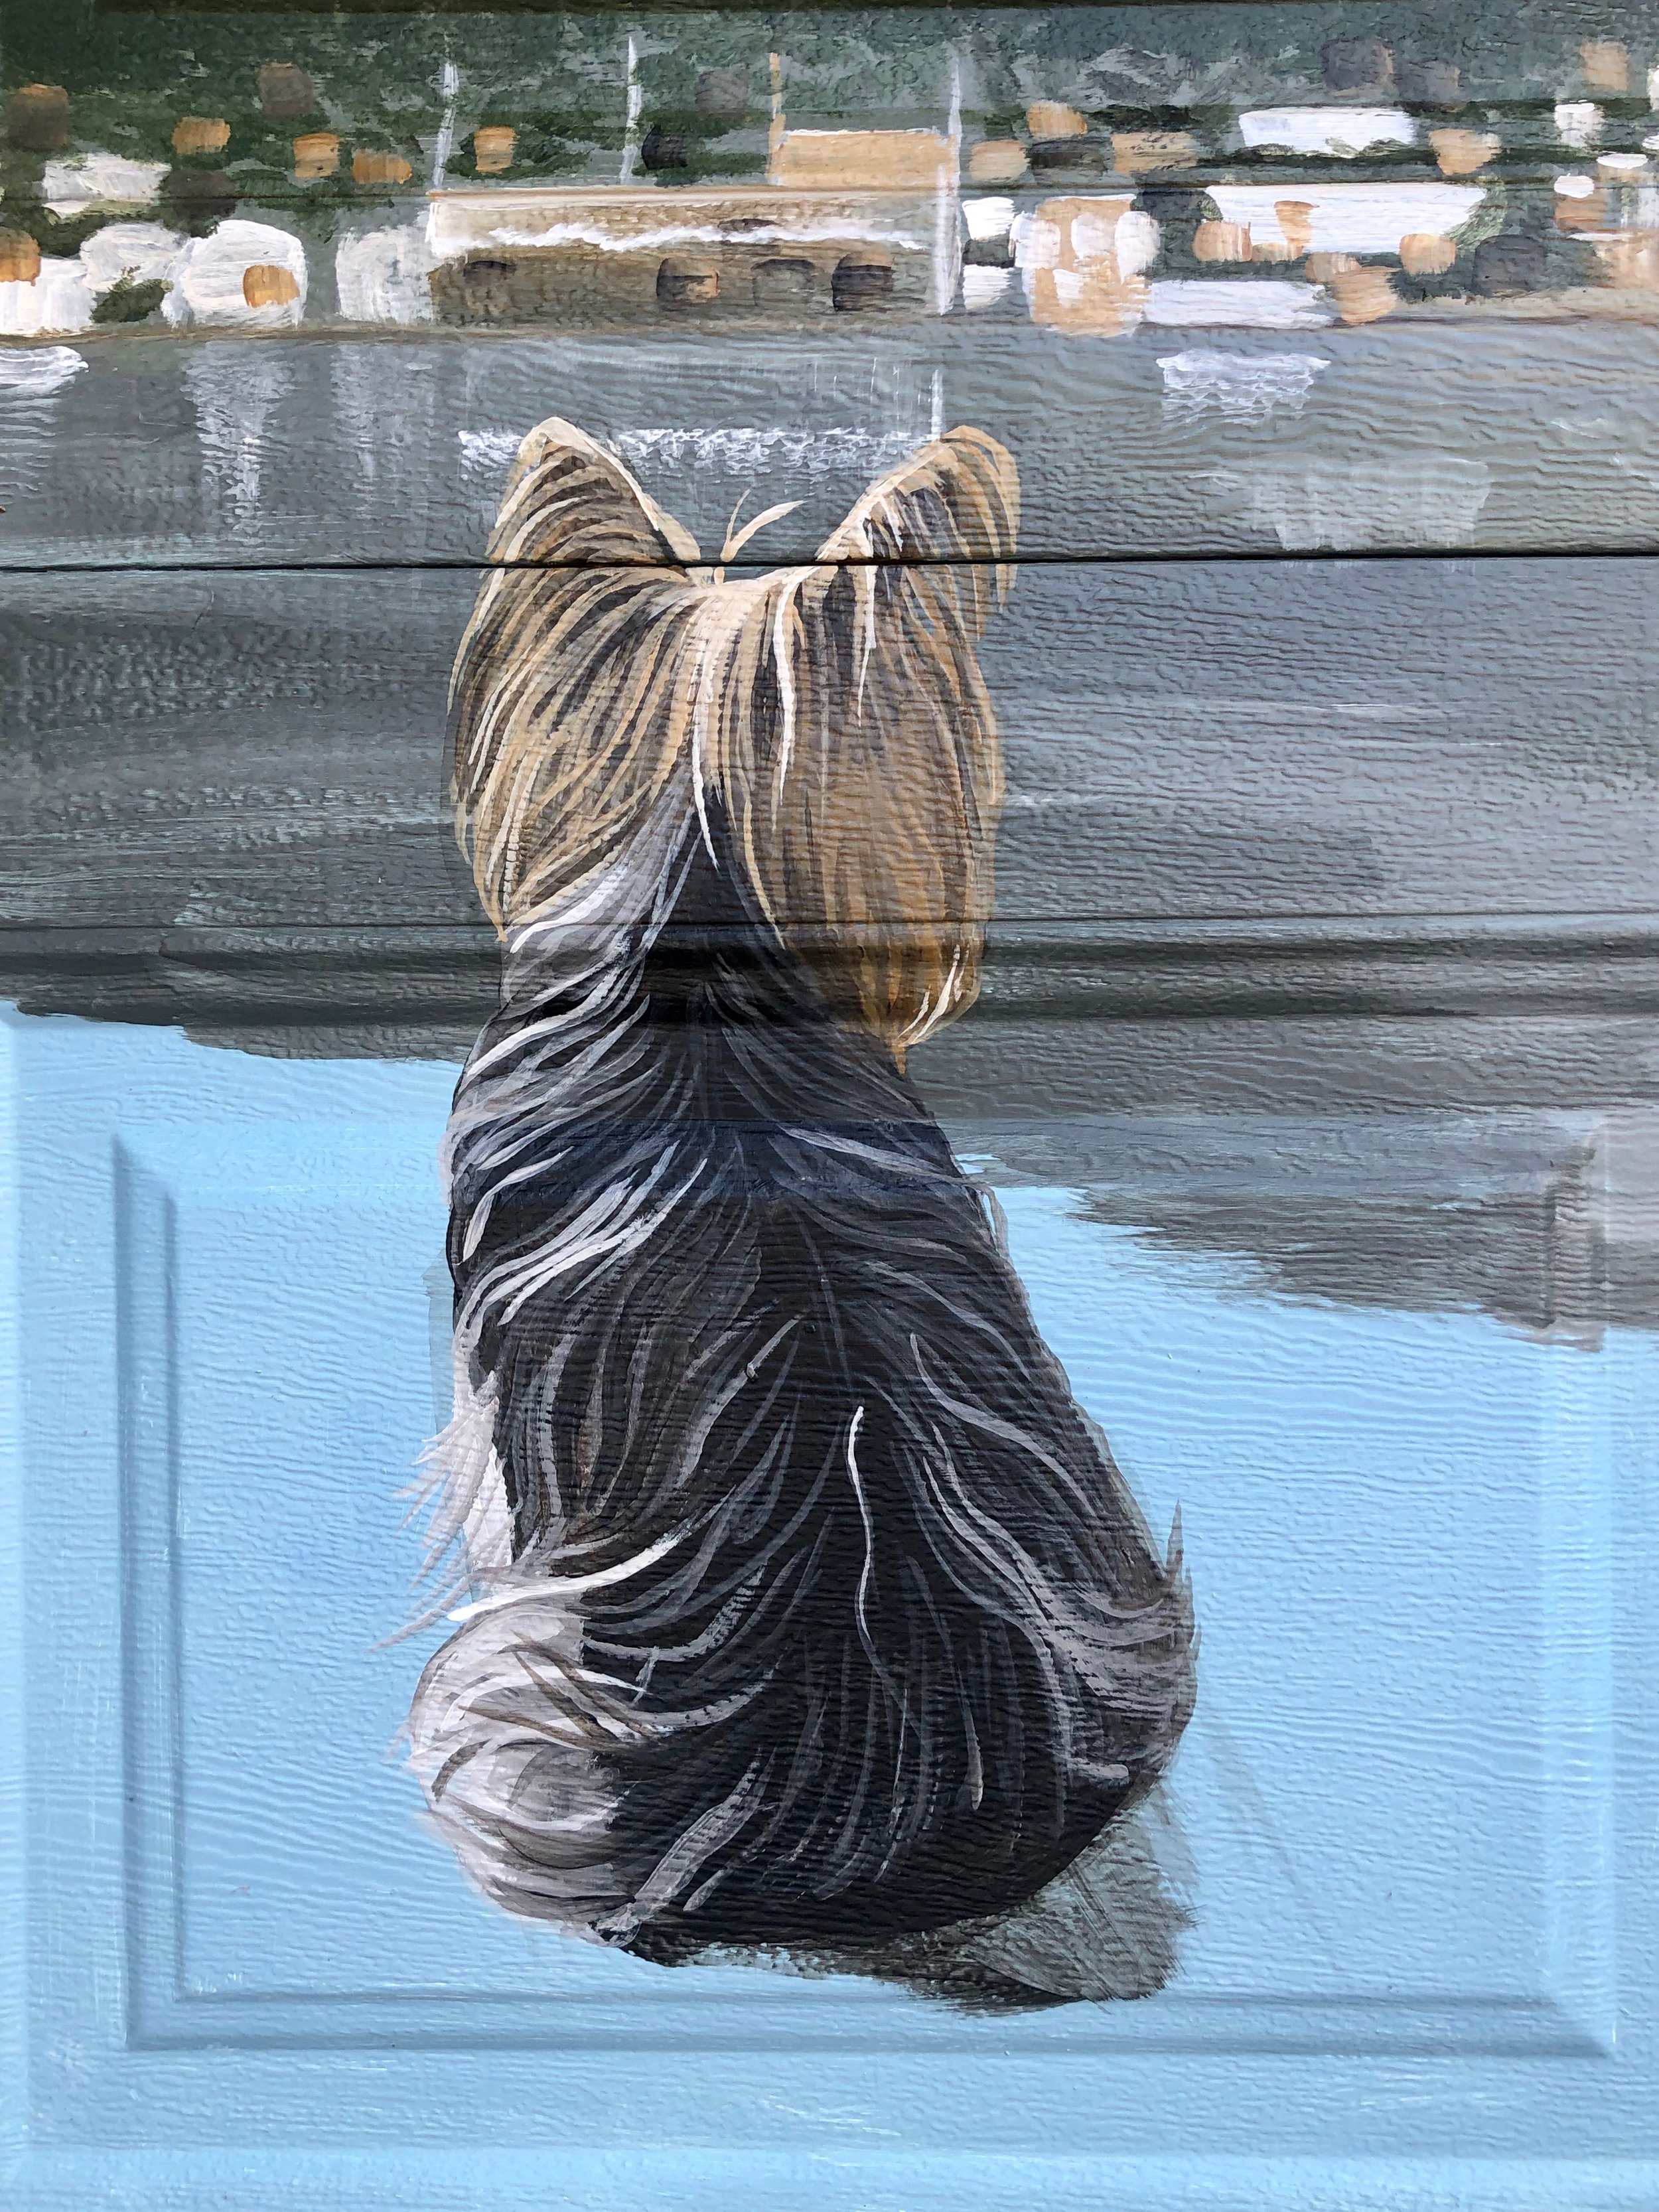
Day 8: This was probably my favorite day, because our little dog Milky was painted into the picture. It looks exactly like her.
Day Nine: The grassy ground is painted for Milky to sit on. She approves.


Day Ten: Last but not least, the California Poppies are painted and the garage is complete.

We were extremely pleased with the end result. All in all, the process took about 9 visits over 2 months. Not bad considering the artist has a day job and we all travel during the summer. Huge thanks to the artist Malwina Stachurska. Highly recommended for converting your own “plain white door” into something special.